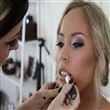
Makeup Step For Beginners
Mastering Makeup Step For Beginners: A Guide for Both Dry and Oily Skin
Introduction:
Makeup is a powerful tool to enhance your beauty and boost your confidence. Whether you have dry or oily skin, embarking on a beauty journey can be both exciting and challenging. In this comprehensive guide, we’ll walk you through the essential cleaning steps for beginners and offer tips tailored for those with dry, oily skin. Get ready to unlock makeup secrets and discover the perfect complexion.
Table of Contents:
- Makeup Basics: A Quick Overview
- Essential Makeup Tips for Beginners
- Building Your Makeup Kit: Must-Have Cosmetics
- Step-by-Step Guide to Basic Makeup: Dry Skin Edition
- Step-by-Step Guide to Basic Makeup: Oily Skin Edition
- Concealer Tips and Tricks for Beginners
- Conclusion: Embrace Your Unique Beauty
1. Makeup Basics: A Quick Overview:
Before you embark on your makeup journey, it is important to understand the basic concepts and terminology. Understanding these basics will put you on the right path to successful cosmetic treatment.
Knowing your skin type: Knowing your skin type is important because it includes makeup products and procedures. The most common skin types are dry, oily, combination and dry. Knowing your skin type will guide you to choose the products that work best for you.
Your skin tone and what lies beneath: Your skin tone is the color of your skin, while your skin is the subtle color under the surface. Skin tones can be categorized as fine, light, medium, tan, deep, and so on. Undertones are generally warm (red, peach, or gold), cool (pink, blue, or yellow), or neutral. Knowing your undertone helps you choose makeup shades that match your skin tone.
Equipment needed: Familiarize yourself with the types of brushes, sponges and applicators used when applying makeup. Brushes come in different shapes and sizes for specific applications, such as foundation brushes, eyeshadow brushes and blending brushes. Sponges like makeup wedges and beauty blenders are great for seamless product application and blending.
Cosmetic bases: An understanding of cosmetic ingredients is essential. These include foundation, concealer and primer. The foundation provides even full-face coverage, the concealer is used to cover blemishes and dark circles, and the primer prepares your skin for application by forming a smooth sheet
Color coordination: Choosing the right shades for your makeup products is important. The foundation should match your skin tone, while the concealer should be slightly lighter to illuminate under eyes. Color matching ensures that your makeup blends seamlessly with your natural skin tone.
Makeup Removers: At the end of the day, removing makeup is just as important as applying it. Before going to bed, invest in a good exfoliator, wipe, or micellar water to ensure there is no residue on your skin.
Eyes and lips: Don’t forget the eyes and lips. Understanding how to apply your eyebrows and how to choose the right lip products will enhance your overall makeup look.
By knowing these basics in makeup, you will be better prepared to create a stunning look that enhances your natural beauty and matches your unique personality.
2. Essential Makeup Tips for Beginners:
Starting your makeup journey as a beginner can be exciting and a little intimidating. To make it easier to navigate the world of cosmetics, here are essential makeup tips designed for beginners:
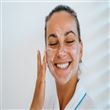
Cosmetics: The fabric of any masterpiece of makeup is your skin. Start with a clean, hydrated mouth. Use a gentle cleanser to remove impurities and follow up with a light moisturizer to keep your skin hydrated.
Primer magic: Consider using a makeup primer. Primer softens the base of your makeup, hides pores, and helps make your makeup last longer. Especially useful if you have oily skin.
Basic: When choosing a foundation, choose one that matches your skin tone. You can apply it with a brush, sponge or fingertips. Blend well, making sure there are no visible streaks or streaks. If you’re new to foundation, opt for a lightweight coverage foundation or BB cream.
Store with care: Concealer is your best friend for covering any blemishes, dark circles, or imperfections. Focus on problem areas, apply sparingly, and blend gently. You can use your ring finger or concealer brush for evenness.
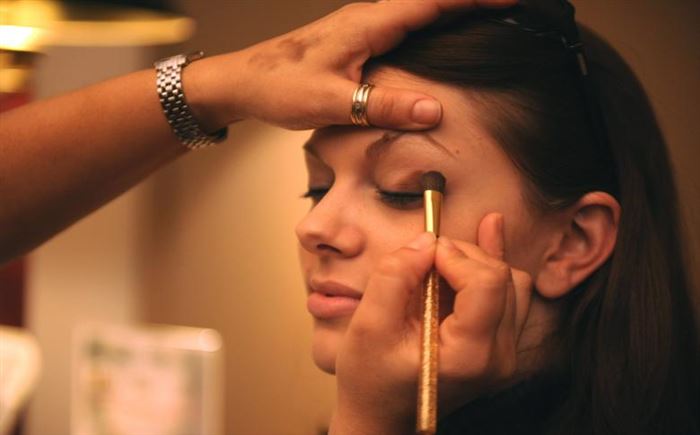
Eye Shape: Defined eyes flatter your face. Use a brow pencil or powder to fill in the shallow areas and create the shape of a brow butterfly. Follow your natural arches for the most beautiful look.
Eyeshadow Fun: Try eyeshadows in neutral shades to start. To add depth, apply a lighter shade to the lid and a slightly darker shade to the crease. Mix well to avoid harsh knots.
Perfect that eye shadow: Eyeliner can enhance your eyes. As a starter, start with a pencil or gel liner for easy application. Practice creating some fine lines around your upper eyelids.
Wet lashes: Exfoliate your lashes with the comb before applying mascara. This simple step will make your eyes look awake and alive.
Blush and Bronzer: Apply blush on the apples of your cheeks for a healthy flush. Bronzer can be used to contour and add warmth to your face. Blend the two products well to achieve a natural look.
Lip Love: Complete your look with a lipstick of your choice. Choose lip balm, lip balm, or lip gloss in shades to match your outfit or mood. Experiment to find your favorite lipstick.
Practice Makes Perfection: Remember that practice is the key to improving your appearance. Don’t be discouraged if your first attempt doesn’t work. With time and patience, you will become more confident and skilled.
Remove makeup before bedtime: Always remove makeup before bedtime to keep your skin healthy. Synthetic materials can clog pores and cause breakage.
These tips provide a solid foundation for your makeup journey. Feel free to change them as you gain more experience and discover your unique style.
3. Building Your Makeup Kit: Must-Have Cosmetics:
As a beginner in the makeup world, it’s important to start with a well-rounded makeup kit that includes the essentials. Here is a list of must-have makeup products that will be ingredients in your collection:
Foundation: Choose a foundation that matches your skin tone. For beginners, liquid or powder foundations are easy to use. Choose a product that makes you feel comfortable, be it light, medium, or full coverage.
Concealer: A good concealer is essential to cover blemishes, dark circles, and imperfections. Look for a slightly lighter shade or a shade that matches your skin tone.
Primer: A makeup primer is a smooth canvas for your makeup and helps it last. It is especially useful if you have oily skin or if you want to reduce pores.
Blush: Blush adds a healthy touch of color to your cheeks. Versatile shades like peach or rose work best for beginners.
Bronzer: Bronzer is great for contouring your face and adding warmth. It helps define your features and gives you a sun-kissed glow.
Eyeshadow Palette: Start with a neutral eyeshadow palette in shades like beige, taupe and brown. These shades are versatile and ideal for everyday looks.
Eyeshaped lines: As a beginner, you can choose between pencil eyeshadows or gel eyeshadows, which are easy to work with. Choose a black or brown shade for a classic look.
Mascara: Mascara enhances your eyelashes, making them look longer and fuller. Black mascara is a safe choice for most looks.
Brow products: Depending on your needs, you can add a brow pencil, powder, or gel to fill in and shape your brows.
Lip Products: Includes moisturizing lip balms, lip balms in various shades and glossy lip glosses
Makeup brushes and tools: Invest in some basic makeup brushes, including foundation brushes or sponges, eyeshadow brushes, blush brushes, and eyeliner brushes These tools make makeup brushing easier and more accurate.
Makeup Remover: A gentle makeup remover or cleansing wipe is essential to remove makeup at the end of the day.
Setting Spray or Powder: Consider using a setting spray or setting powder to help your makeup last longer. This step is especially important if you have oily skin.
Beauty Mixer or Makeup Sponge: This sponge is useful for mixing foundation, concealer and other products for a smooth finish
Lash Curler: Curling your lashes before applying mascara makes your eyes look open and sleepy.
Makeup bag: Invest in a makeup bag or organizer to keep your makeup organized and easily accessible.
When you start using these bathroom essentials, you will have a versatile makeup that can give you a variety of looks from natural to sophisticated. As you gain experience and confidence, you can expand your collection with other items to suit your personal style and taste.
4. Step-by-Step Guide to Basic Makeup: Dry Skin Edition
When you have dry skin, it is important to choose products and methods that hydrate and nourish your skin. Here’s a step-by-step guide to creating a basic makeup look that complements dry skin:
The First Way Prepare Your Skin
- Start with a clean, moisturized face. Use a gentle cleanser to remove any impurities and follow with a hydrating moisturizer to provide a smooth canvas for makeup application.
Step 2: Prime your face
- Apply a hydrating makeup primer. Look for primers with ingredients like hyaluronic acid to boost moisture levels and create a barrier between your skin and makeup.
Step Three: Apply Foundation
- Choose a liquid or cream foundation with a dewy finish. Use a makeup sponge or foundation brush to apply it evenly. Avoid matte or powder foundations, as they can accentuate dryness.
Step 4: Hide imperfections
- Dab a creamy concealer on areas with blemishes or dark circles. Gently blend it in with your finger or a makeup sponge. Select a concealer that matches your skin tone or is slightly lighter.
Set Step 5: Spray or Powder
- Lightly set your makeup with a hydrating setting spray or a translucent setting powder. This step helps your makeup stay in place without drying out your skin.
Step 6: Add Blush to Color
- Choose a cream blush in a warm, rosy shade. Smile and apply the blush to the apples of your cheeks, blending it gently with your fingertips.
Step Seven: Train Your Eyes
- Opt for eyeshadows with a satin or shimmer finish to add a touch of radiance to your eyes. Apply neutral tones like soft pinks, taupes, or peaches. Add a couple of coats of mascara to open up your eyes.
Step eight: Don’t wet your lips
- Finish the look with a hydrating lipstick or tinted lip balm. Matte lip products can be drying, so stick to creamy or satin finishes for your lips.
Step 9: Set the spray to dew point
- Finish your makeup routine with a final spritz of hydrating setting spray to lock in your makeup and provide a fresh, dewy finish.
Step 10: Touch-Up
- Throughout the day, if you notice any dry patches, use a hydrating facial mist or a small amount of moisturizer to refresh your makeup and keep your skin hydrated.
Remember, the key to keeping your skin looking great is using products that hydrate and brighten. With this step-by-step guide, you can achieve beautiful and glowing makeup while maintaining the health of your skin.
5. Step-by-Step Guide to Basic Makeup: Oily Skin Edition
If you have oily skin, you may want to follow a specific cleansing routine to ensure that your complexion lasts throughout the day and that you remain glowing. Here’s a step-by-step guide to creating a basic makeup look designed for oily skin:
Step One: Cleaning and Preparing
- Start by cleansing your face with a gentle, oil-free cleanser to remove any excess oils and impurities. Follow with an oil-free moisturizer to keep your skin hydrated without adding extra oil.
Step 2: Apply an oil-free primer
- Apply a mattifying, oil-free makeup primer to create a smooth base and control excess shine. This step is essential for oily skin types.
The third step is the skin oil foundation
- Choose a matte, oil-free foundation or a powder foundation. Apply it evenly using a makeup sponge, brush, or your fingertips. The matte finish helps reduce shine throughout the day.
Step 4: Hide the stain
- Use an oil-free concealer to cover blemishes, redness, and under-eye circles. Blend it well to achieve a flawless finish.
Step 5: Apply light powder
- Apply a light layer of translucent setting powder to areas that tend to get oily, such as your T-zone (forehead, nose, and chin). This will help set your makeup and control shine.
Step 6: Add definitions to your products
- Choose a matte bronzer or contour powder to define your cheekbones, jawline, and nose. Avoid shimmery products, as they can make your skin look oilier.
Step Seven: Visual Design
- Opt for matte eyeshadows and use an eyeshadow primer to prevent creasing. Matte eyeshadows are less likely to emphasize oiliness. Finish with a waterproof mascara to prevent smudging.
Step 8: Install the sprayer
- Finish your makeup routine with a makeup setting spray designed for oily skin. This will help keep your makeup in place and reduce the need for touch-ups.
Nine Step Lipstick
- Use a long-wearing, matte lipstick or lip stain for your lip color. Matte lip products tend to stay in place better and don't add shine to your face.
Step 10: Peeling the leaves
- Throughout the day, use blotting papers to absorb excess oil. Avoid adding more powder, as it can make your skin look cakey.
By following this step-by-step guide, you can achieve a matte and long-wearing makeup perfect for oily skin. Experiment with different products to find what works best for your skin type. Remember, the key to successful oily skin is choosing products that are oil-free, matte, and long-lasting.
6. Concealer Tips and Tricks for Beginners:
Concealer is a magical tool in the makeup world. It can cover blemishes, dark circles and imperfections, giving you a flawless complexion. Here are some important tips and tricks for beginners to get the most out of your concealer:
1 Select Right Shadow:
- Select a concealer that matches your skin tone or is slightly lighter. For covering under-eye circles, a shade slightly lighter than your skin tone is ideal.
2 Prepare your skin:
- Before applying concealer, start with a clean and moisturized face. Apply your foundation first, and then use concealer to target specific areas.
3 Use the right tools:
- You can apply concealer with your fingertips, a makeup sponge, or a concealer brush. Choose the method that works best for you.
4 Less is more:
- Begin with a small amount of concealer, as adding more is easier than removing excess product. You can always build up coverage if needed.
5 Functional Focus
- Apply concealer directly to the areas you want to cover, such as blemishes, redness, or dark circles. Use gentle patting or stippling motions to blend.
6 Blend Well:
- Blending is key. Make sure to blend the edges of the concealed area seamlessly into your skin or foundation for a natural look.
7 Color correction:
- To neutralize specific imperfections, use color-correcting concealers. For instance, use a peach or orange concealer to counteract bluish under-eye circles before applying your regular concealer.
8. Apply powder:
- To prevent creasing, set your concealer with a small amount of translucent powder. This helps it stay in place throughout the day.
9 Publications:
- To brighten the under-eye area, apply concealer in an inverted triangle shape with the base along your lower lash line. Blend well for a more awake appearance.
10. Stay near the water:
- When covering redness on your waterline, opt for a concealer pencil or a small brush to reach those tight spaces.
1 Multitasking:
- Your concealer can double as a highlighter. Apply a bit to the high points of your face (cheekbones, bridge of the nose, and cupid's bow) for a subtle glow.
1 Test in natural light:
- Always check your concealer in natural light to ensure a perfect match and blend.
1 Test
- Don't be afraid to experiment with different concealers and techniques until you find what works best for you.
Concealer can be a game changer in your makeup routine. With these tips and tricks, you will be well on your way to achieving flawless skin.
Conclusion: Embrace Your Unique Beauty:
Whether you have dry or oily skin, looking your best is all about expressing yourself and embracing your individuality. With these makeup steps, tips and tricks, you can confidently enhance your beauty and create a stunning look that suits your unique skin tone. Don’t hesitate to explore and experiment – makeup is your canvas, and you are the artist!
Comments
Advertisement

Trending blog